
Table Of Contents
- Introduction
- Why Preparation Matters
- Check the Door Before Starting
- Gather Tools and Supplies
- Protect Glass and Hardware
- Smooth the Wood Carefully
- Clean Before Staining
- Choose, Test, and Apply Stain
- Add Protection and Maintain It
- Frequently Asked Questions
- Final Thoughts
A beautiful stained entry door starts long before the first coat goes on. Wood grain, sanding marks, dust, handling oils, and small dents can all become more visible once color is applied. Taking the time to prepare the surface properly is the most reliable way to achieve an even finish that complements the door rather than highlighting its flaws.
Whether the door is newly installed or being refinished, the process of staining a door should begin with a careful inspection and a clear plan. The objective is not to make every surface glossy and smooth. It is to create a clean, consistent surface that accepts stain predictably and can hold a compatible protective finish.
Why Preparation Matters
Stain does not cover a surface the way opaque paint can. It tends to emphasize scratches, uneven sanding, glue residue, rough grain, and fingerprints. A consistent surface helps stain absorb more uniformly, while a clean surface supports better adhesion from the finish system applied afterward.
Check the Door Before Starting
Move the door to a clean, well-lit workspace if possible. Look across the surface from several angles and mark dents, scratches, glue spots, raised fibers, rough edges, and damaged profiles with low-tack painter’s tape. Confirm whether the door is solid wood, wood veneer, or another material before sanding.
Material matters. A wood-grain fiberglass door may look like wood, but it should not automatically receive the same sanding treatment. For example, instructions for wood-grain fiberglass doors call for cleaning the molded surface rather than sanding away its texture. Check the door manufacturer’s instructions before using abrasives, solvents, or stain.
Gather Tools and Supplies
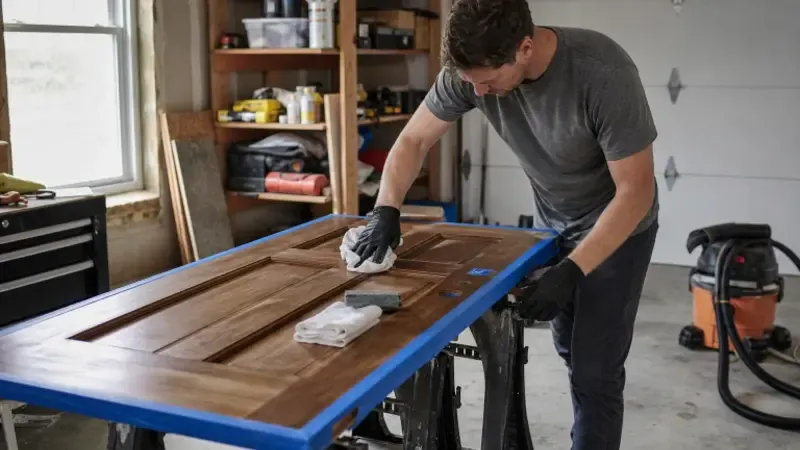
Set up everything before opening a can of stain. A practical kit includes clean, lint-free cloths, a vacuum with a soft-bristled attachment, painter’s tape, drop cloths, fine-grit sandpaper, a sanding block, a detail brush, gloves, eye protection, and adequate ventilation. Add a wood conditioner only if the stain system or door manufacturer recommends it.
Protect Glass and Hardware
Remove handles, locks, hinges, and other hardware when practical. Mask glass with painter’s tape and clean paper, and cover nearby flooring, trim, and work surfaces. Press tape edges down firmly so the stain cannot seep beneath them. Avoid razor blades or metal scraping tools near glass, since they can cause scratches.
Smooth the Wood Without Over-Sanding
Sand with the grain using the least aggressive grit that will correct the problem. Use a sanding block on broad, flat areas to help keep the surface even. Sand narrow profiles, panel edges, and decorative details by hand so their shape remains intact. Blend repaired areas gradually into the surrounding wood.
Stop when the door feels consistent to the touch. Excess sanding can round crisp edges, create shallow spots, or cut through veneer. The goal is to remove flaws and create a uniform texture, not to remove unnecessary material.
Clean the Surface Before Staining
Vacuum the door, the work area, and the corners where dust gathers. Then wipe the surface with a clean cloth and any cleaner recommended by the finish manufacturer. Let moisture or cleaning residue evaporate fully. Run a clean hand lightly over the wood to find remaining grit, then repeat the dust-removal step as needed.
Choose, Test, and Apply Stain
Select a stain made for the door material and its location. An exposed exterior door needs a finish system suited to moisture, sunlight, and temperature changes, while a protected interior door has different demands. Confirm that the stain and clear topcoat are compatible, and remember that the same color can look different on different wood species.
Test the Color First
Use a matching wood sample or an inconspicuous area of the door. Apply the stain and planned topcoat exactly as you intend to use them on the full project. Let the sample dry completely, then view it in daylight and indoor light. A wet stain can look different from its final cured color.
Work in a Controlled Order
Stir stain slowly, then work in manageable sections while maintaining a wet edge. On a panel door, use a repeatable order: recessed panels first, then profiles, rails, stiles, and edges. Follow the grain, wipe away excess according to the label, and check joints and corners before the stain dries. Allow the full stated drying time before adding another coating.
Add a Protective Finish and Maintain It
Stain provides color, but a compatible protective coating helps the door resist everyday wear and weather exposure. Apply thin, even coats rather than one heavy coat, and follow the product’s drying, recoating, and light-sanding directions. Guidance on applying a semi-transparent or opaque stain to wood also emphasizes the need for clean, dry surfaces and suitable site conditions.
Inspect an exterior door regularly for dullness, fading, cracks, peeling, swelling, or exposed wood. Clean it with products approved for its finish, address small worn areas promptly, and keep drainage or landscaping from sending water toward the door.
Common Mistakes to Avoid
- Staining over dust, oils, wax, or damp wood.
- Skipping the color test.
- Sanding across the grain or over-sanding edges.
- Using an interior-rated finish on an exposed exterior door.
- Applying overly heavy coats or recoating too soon.
- Ignoring panel joints, door edges, hardware cutouts, and recessed details.
- Working in direct sun or conditions outside the product label’s recommended range.
Frequently Asked Questions
Can a Door Be Stained While It Is Hanging?
Yes, but removal can make sanding, wiping, and coating the edges easier. A hanging door is often more practical for small touch-ups or when removal is not feasible.
Should Every Wood Door Use Conditioner?
No. Conditioner depends on the wood species, stain system, and manufacturer directions. Test it on a sample before committing to the full door.
What Should You Do if the Stain Looks Blotchy?
Stop before adding more stain. Review sanding consistency, surface cleanliness, wipe time, and product compatibility. Test any correction method on a separate sample first.
When Is Professional Help a Better Choice?
Consider a professional for damaged veneer, extensive repairs, complex glass layouts, uncertain product compatibility, or limited ventilation.
Final Thoughts
A durable, even stain begins with patient preparation. Inspect the door, protect nearby surfaces, sand with restraint, remove every trace of dust, test the color, and use a compatible exterior-rated finish when the door faces the elements. Those steps give the finished door its best chance to look refined and perform well for years.